Saturday, March 12, 2011

Lorna Morgan Blue Blouse How Old Is Lorna Morgan?

Workshop - Mini album

On Saturday March 26 will give a workshop in Blokum.

Hours: 10am to 14pm

See! ;)


Wednesday, March 9, 2011

Light Olive Colour Paint

Thermofusion in Cosplay:


Ok first of all, this term I know because I study urban design and refers to the joining of plastic pipes such as polyethylene, polypropylene, PVC, and other plastics, using heat and pressure. To learn more visit http://www.fullmecanica.com/u/union-de-tubos-con-termofusion


Here I apply a smaller scale with the accessories of plastic, if you started to use for errors that arose in several projects, but had no photos, nor the expertise to make a tutorial, until I made the costume of Bishamon and claws Hsien-ko.


WARNING: Do not use this technique if you have not read all the recommendations and use the necessary precautions so could cause injury or fire. Be cautious.


basically heating plastic to its melting point (more or less when this soft), not to be incinerated, just this soft and once this is done have to apply pressure and let it cool, that's all.


Now everything is not so simple, there are several aspects to be covered to prevent accidents (such as burn wounds):


How we heat the plastic? I have seen many tutorials on the internet where they shape the plastic in the heat of the stove, and good is an option, but wastes a lot of energy, I recommend you use a candle, its flame and not look down at its tip is about of 1100-1200 or C. [1] The second option is a lighter, which is the one used in the photos.

How should see the plastic melting point? For will simply softens, if a painting can be seen little dark, but this is by burning plastic colors, to avoid arguments, most of the plastic "thin" reach its melting point within 5 seconds of exposure to heat from the candle, and "thick" as PET, which reach to 10 seconds.

How long piece should be heated? Although parts which only requires a junction point have no problems, long pieces, require a skill a little faster, since it has to pass the flame, for the fusion line rapidly and continuously, about 7 seconds if it was timely.

How and to apply pressure to join the pieces? Initially use bottle caps, because their shape allows its use, like a paste and rub the spot or allow the fusion line, for a better finish, but then use my fingers, because the plastic does not as hot, just needed a little wet my fingers before rubbing the area to unite and avoid burn, also use tweezers. But I recommend the bottle caps.


Finally, remember that fire is a very dangerous if you use this technique to avoid having a flammable liquid near the candle can put you on a piece of cardboard, so that will not stain anything, do not want to bother with us, avoid working on carpets, beds, sofas or any combustible surface.


Above all do not bring his face to the fire, the heat can burn the eyebrows, eyelashes or hair. When finished using the candle turn it off. Be cautious and if they are under age, ask an adult for help, beware, the most valuable tool we have is the body.

Tuesday, March 8, 2011

How To Smile If You Have A Crooked Nose

hanger for keys "S"

hanger for keys S


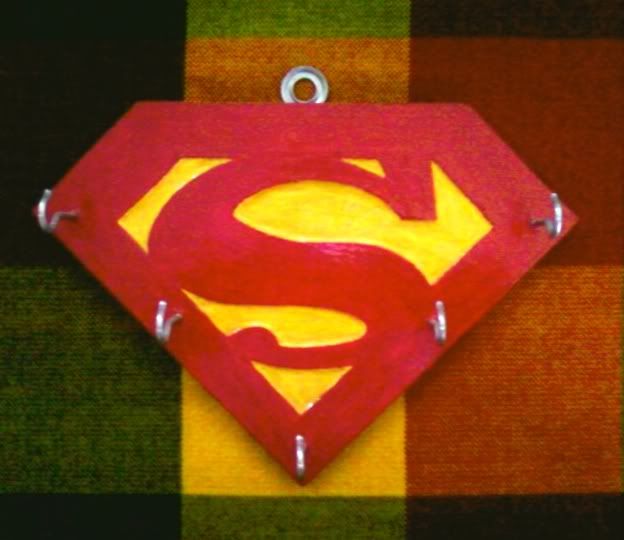
This is very simple to do and can do any symbol you want, I chose the "s" because my dad is a fan of super man. What I did was very simple and we need is:

· A piece of wood of the desired dimensions

· Gouges (wood carving tools) find at hardware stores

· Armella open: the amount that we see fit, in my case were 5

· Cola duck-are fasteners for pictures and like the previous one as found in hardware stores

· Screws: l only need to queue 2 duck will be enough, look to be small and fit either dovetail


Well in advance they must remain at the photos in this tutorial as well (as other tutorials the photos were on the cell phone was stolen)

The steps are simple and requires no hard work, the issues are these:

wood
Table Insignia


First, to get the piece of wood to do a paper mold, it must be done right from the start and modeled it after. Now on to the carpenter and ask that you cut the wood with the way we want.


Once ready, we remove the wood gouges in the spaces of the second plane (Focus: the "s", Second background: yellow background) to give relief.


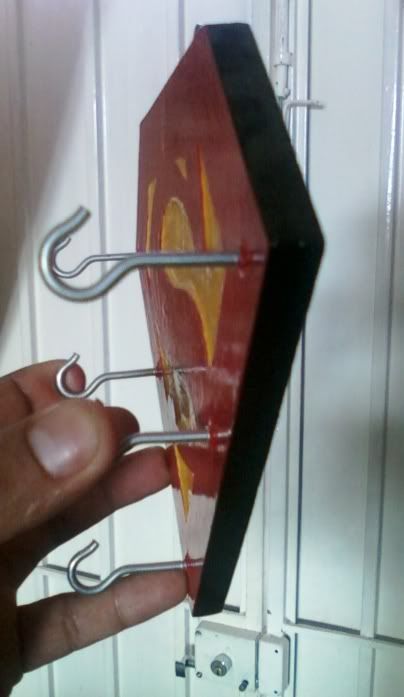
now turn to complete (jajajajaja really this easy) place to eyebolts; for this (lar head screw eyebolts are) just have to rotate them with a little pressure against the wood and entered alone.

After
do the same with the Dovetail, with this be careful that otherwise remain focused crooked.

Now remove everything (eyebolts and dovetail) Why did this? To mark the wood, because if you paint first, we could lift the painting and not want that.

To paint can rely on the following topics:
precautions on the use of paint
Before Painting

once painted and put the eye bolts and ready dovetail, that would be all, my father was very happy and I felt great